
New article
Recently updated
Getting Started with Course Builder

Who is this article for?Clients with access to Course Builder.
Course Builder can be enabled on a users profile of any role, however this permission can only be given by a Client Administrator.
Course Builder access can only be enabled by a Ideagen Workplace Training administrator, so please contact support.workrite@ideagen.com to request this.
If you would like to have Course Builder implemented onto your system, please speak to your Account Manager.
This article will guide you on how to create and make amendments to courses within the Course Builder application. It has been split into sections, so if you know what you want to look at please click on the heading below to jump straight to that section.
IMPORTANT INFORMATION!Here are some terms you will come across in this article and what they mean:
Module - This refers to the different sections your course has been split up into.
Scene - This refers to a page or slide within a module.
- Creating a Course
- Changing a course name
- Changing a course image
- Adding, moving or deleting a module
- Adding a new scene
- Navigating around your course
- Editing text and layout in a scene
- Editing an existing course
- Clickable images
- Add/Edit audio
- Change Scene Type > Question
- Change Scene type > Information Review
- Previewing a course
- Saving a course
- Making a course live
- Locking
- Licensing and Deploying Courses
1. Creating a Course
To create a new course within the course builder you will need to do the following steps:
- From the Ideagen Workplace Training home page select the Course Builder.
- Select New Course in the top right-hand corner
- Insert your new course name and select Create New Course.
- Your screen will load you straight into the new course for edits to be made. If you exit this view, the new course will now appear within your list of courses
2. Changing a Course Name
You can amend the course name from within the Course Builder application. This is the name that will be displayed when a user logs in to access their E-Learning.
- Click on the course you wish to amend. This will open a new box as shown below. From here you can select CHANGE COURSE NAME in the top right corner.
- In the next dialogue box, enter the new course name and select SAVE CHANGES.
- When you close the box, you will see that the course name has changed in your course list. The course will rearrange itself to sit alphabetically amongst any other courses you have.
3. Changing a Course Image
You can amend the course image from within the Course Builder application. This is the image that will be displayed when a user logs in to access their E-Learning.
- Click on the course you wish to amend. This will open a new box as shown below. From here you can select CHANGE COURSE IMAGE in the top right corner.
- The Change Course Image pop-up box is displayed. From here you will be able to select any images that are in your current image library. You will also have the option to upload a new image from your device.
- To select an image from your library, open the arrow next to the Course name where your image is located and select the image you want to use.
The image folders you have available in your library will depend on what Ideagen Workplace Training courses are licenced to your system and these may be different from the example image above.
- To upload an image from your device, select UPLOAD IMAGE. From here you can either select to Upload a file, or drag and drop an image from your desktop into the Drop file here zone.
- The new image will replace the original and will now display on your course list page.
4. Adding, Moving or Deleting a Module
For this part of the article, you will need to be in the Course Builder and have selected an existing or newly created course, select the Edit button ready to edit
Modules are the different sections within the course. Each module is displayed in the course menu.
- To add a module, select the green plus symbol at the top of the Modules menu
- The new module will be added to the bottom of the menu, and will default the name to Section##
- To rename this, hover your cursor over the module which will bring up 3 options. Select Edit
- A box will appear. From here you can enter the new module name and select CLOSE. If you need to move the module then you can simply drag this to the correct location.
IMPORTANT! Make sure you Save your progress as a Draft as you go so as not to lose any progress
- You can also delete a module by hovering over any module and selecting DELETE. A box will pop up warning you that by deleting a module you will also delete any scenes within that module so please make sure you are happy with this before proceeding.
5. Adding a New Scene
A scene is a page or slide within a module. To add a new scene:
- Hover over the module you wish to add or edit scenes in and select Scenes
- Select Add Scene from the Course Editor menu on the left
- A new, empty scene is displayed. The scene name/number is displayed at the top of the screen.
6. Navigating Around Your Course
This part of the article assumes that you are now in Course Builder and are in an existing or newly created course. To edit a particular scene within a module:
- Hover over the module you wish to edit and click on the Scenes button
- Along the top of the Course Builder, you will see the title of the module that you are editing. Next to this there is the Scene drop down menu where you can select the scene that you wish to edit. Selecting a scene will open immediately.
Alternatively you can use the arrow icons next to the drop-down menu to navigate your way through the modules.
Single arrows will move you one scene forward or backwards and the double arrows move you straight to the beginning or end of the module.
7. Editing Text and Layout in a Scene
This section of the article assumes that you are now editing an existing or newly created course in the Course Builder.
To change an existing background image within a scene:
- Hover over Edit Scene in the navigation column on the left hand side and select Change Background Image.
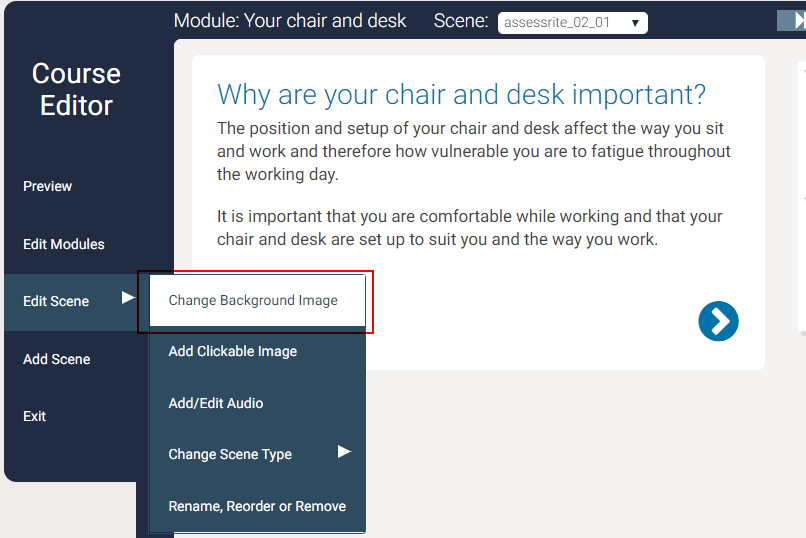
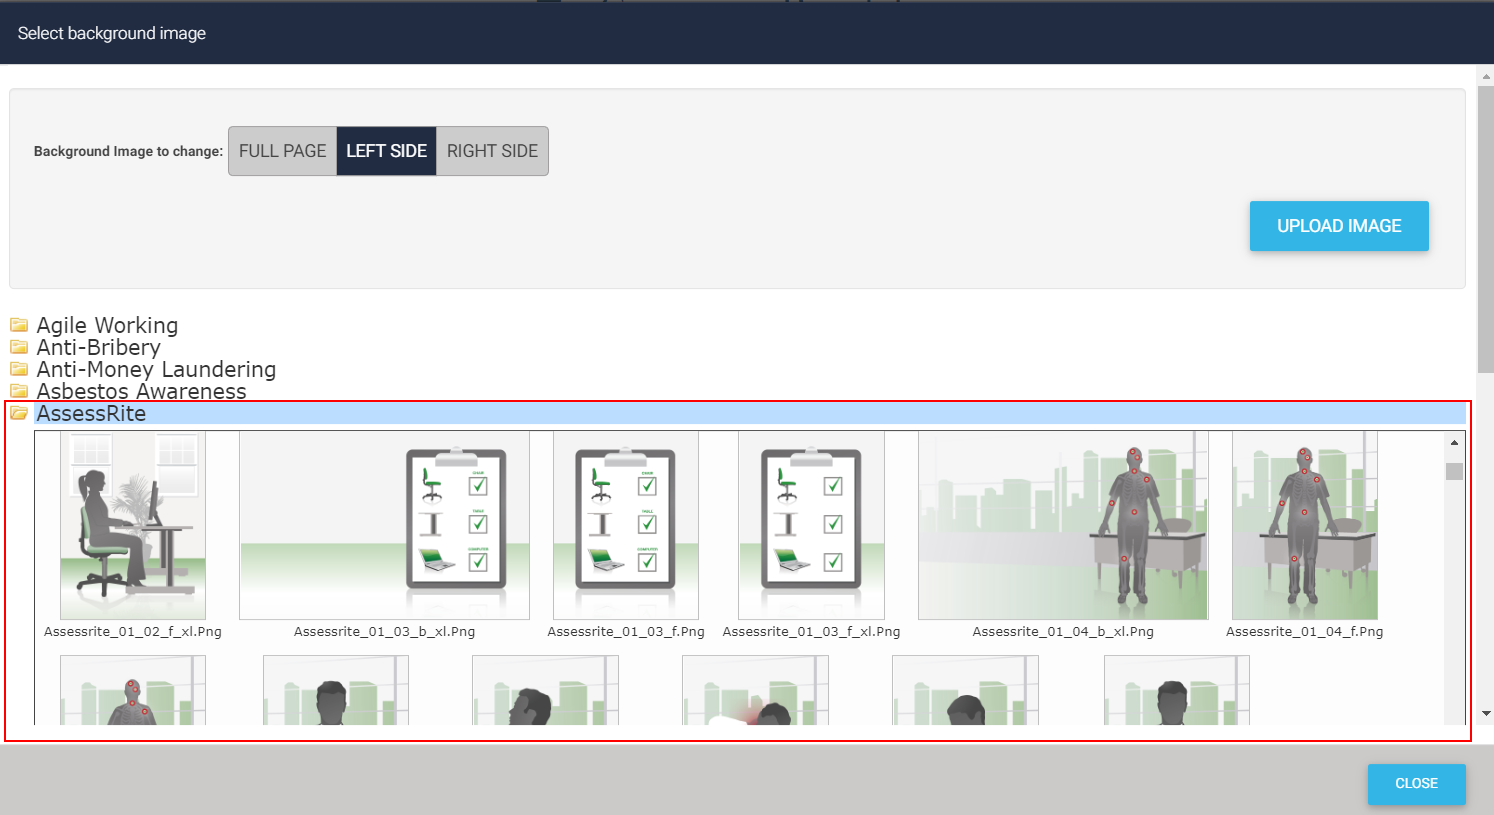
- The Select background image pop up is displayed.
- At the top of this page you can select if you want to change the background image for the Full Page, Left Side or Right Side.
- Choose which background image to change (left, right or full) before uploading a new or selecting an existing image.
- Select the course folder from which to choose your background image.
- Select the image to insert.

- You see a success message at the top of the screen as the image is changed.
You can also add a new image as a background image from your device. To do this:
- Select the UPLOAD IMAGE button
- The Upload a file panel is displayed. You can either drag and drop a file from Windows Explorer or select Upload a file to open a Windows Explorer window and select your image. Note, image files must be in the following formats: .jpg, .jpeg, .gif or .png

- Success is displayed at the top of the screen.
- Close the Select background image pop up and you can see that your background image has changed.
- Once you have uploaded a photo to your course, it is automatically be added to your course image library so that you can use it again in other scenes if required.
8. Editing an Existing Course
You are able to make edits to our master courses if for example you are happy with the majority of it's content, however wish to make a few tweaks to make it more specific to your organisation.
IMPORTANT INFORMATION!It is very important to first make a Copy of the master course so that you are not editing the original version as this causes technological issues.
To do this:
- Click on the course you wish to edit, and select EDIT
- Make an amendment to create another version, such as editing the title of a module by adding and removing a character. This way nothing has actually changed on this version of the course yet, but you are able to Save a new version as Complete.
- You will now see a new option to Copy this course. Make sure you check the Live box again if you wish for users to still be able to access the current version of the course while you make edits to the new version. Select Copy
- A box will pop up allowing you to enter the name of your new course. Select CREATE NEW COURSE once you are happy with the information entered.
- Once you have selected this, you will be taken straight into your new version of the course which you can make edits to as required. You will see five options in the left hand column:
-
- Preview
- Edit Scene
- Settings
- Help
- Exit
Remember to save progress as you go along. Saving as a Draft will allow you to return and make further edits at a later date. Saving as Complete will create a new version of the course.
You can edit your course as described in the following articles.
- Adding, moving or deleting a module
- Editing text and layout in a scene
- Editing the background image within a scene
- Information Review Scene Type
- Question Scene Type
- Add/Edit Audio
- Clickable images
Once you exit, you will be taken you your course list where your new version will be displayed alphabetically.
9. Clickable Images
This section of the article assumes that you are now editing an existing or copied course in the Course Builder. Clickable images CANNOT be added to our standard courses. If you wish to add a clickable image to a standard course you will need to make a copy of the course first. Please click here to find out how to do this.
Clickable Images enable your end users to see a second, alternative image when they hover over an image within
your course. You can also select a clickable image to take you to a different scene or module within this course.
To add a Clickable Image:
- Once you are in the desired module, hover over Edit Scene in the Course Editor and then select Add Clickable Image
- A default image will then appear within your scene
- Hold and drag the image box to the position that you would like it in your scene. You can also drag the corners and sides of the image to resize it.
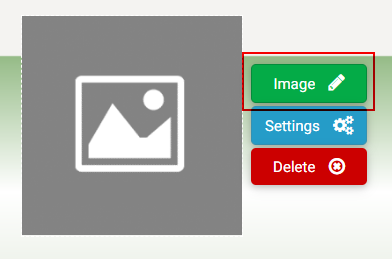
- Hover over the image and click on the Image button to select an existing or upload a new image.
- The Change Image pop up is displayed. By default, the Main Image option is selected. You can select Hover Image to upload or select a second image which will appear when the learner hovers over the original image
- If you wish to upload an image from your device, select UPLOAD IMAGE where you will be given the option to upload a file or drag and drop the file from your device.
- Switching back to LIST IMAGES will bring you to the image folders you have access to.
- Insert the images you wish to include as clickable images by selecting the image which will update on the scene straight away indicated by the following success message.
Now that you have selected the image, you can update the functionality of this by following these steps:
- Hover over the image and select the Settings button
- In the Change Settings pop up you can rename the image if preferred. Then select the Do you want to move to another Scene or Module slider and move it to Yes.
- Using the next slider that then appears, you can select between navigating to a Scene or a Module. You can then use the drop down menu to the right of this to select the Scene/Module you want this image to jump to.
- If you wish to delete a clickable image, simply hover over the image and click on the Delete button.
10. Add/Edit Audio
To add new, or edit existing audio into any of your scenes:
- Hover over Edit Scene and select Add/Edit Audio.
- In the Select Audio File pop up you can either select an existing audio file from your library or select UPLOAD AUDIO FILE to select this from your device
To upload a new audio file:
- Select UPLOAD AUDIO FILE in the top right-hand corner.
- You can now either drag and drop an audio file from your computer into the drop area, or select Upload a file and choose a file to upload. Audio files must be in either .mp3 or .m4p format.
- The audio is successfully added to the scene
- You will now see the audio you selected for this scene.
In most cases, you will want the audio to play once, when your learner opens the screen. To ensure this, select the Play Once slider to move it to Yes.
You can also delete the audio from this scene by selecting the Bin button.
Learners will have the option to either mute or pause the audio along the top of the course player.
11. Change Scene Type > Question
This section of the article assumes that you are now editing an existing or copied course in the Course Builder and are familiar with how to edit a scene.
Questions within your course require the learner to answer them before being able to continue to the next page. Feedback can also be provided to the user for each answer that they click. You can also have specific answers jump to other modules or scenes in your course.
To add a question scene:
- Hover over Edit Scene then hover over Change Scene Type.
- Select Question.
- A warning box will pop up asking to confirm you are happy to make the adjustment as any non-standard settings will be deleted. Don't worry, you can always preview any changes you make before saving them, and any changes you are not happy with simply exit the course without saving.
- A question box will be displayed in the top right-hand corner of the scene
To edit the question text:
- Hover over Choose the right answer and select Edit. This will allow you to type over or amend the existing question text.
- Amend your question text and select the tick in the right-hand corner to save your changes.
To edit the answers:
- Hover over the answer you wish to amend and select the Edit button.
- Change the Answer Text.
- Add any feedback that you would like to appear for this answer in the Message to Display box.
- Use the slider at the bottom of this page to select if this answer is correct or incorrect.
- Select CLOSE once you are happy with your selections.
To navigate to another scene or module:
- Hover over the answer which will contain the navigation.
- Select the Actions button.
- Select Yes to Do you want to move to another Scene or Module?
- Use the Move to: slider to toggle whether to take the learner to a new scene or a different module when this answer is selected.
- To add any additional answers to your question, select the Add Answer button at the bottom of the
question box and repeat the above process.
12. Change Scene Type > Information Review
This section of the article assumes that you are now editing an existing or copied course in the Course Builder, and are familiar with how to edit a scene.
An Information Review Scene enables you to include more information in one scene, which requires the learner to select each title. You can also ensure that the learner has to review all of the sections before being able to continue to the next scene.
To create an Information Review scene:
- Hover over Edit Scene and then hover over Change Scene Type.
- Select Information Review.
- A warning box will pop up asking to confirm you are happy to make the adjustment as any non-standard settings will be deleted. Don't worry, you can always preview any changes you make before saving them, and any changes you are not happy with simply exit the course without saving.
- A list will begin to generate. You can add as many options to this list as you require. Hover over the first topic in the list and select Edit.
- Enter the topic title under Text and enter the topic content in the Message to display field. You can format the text using the buttons above the text field. Once you are happy with the content, select CLOSE.
- Repeat these steps to add further topics to the screen.
You can edit the Information Review sections by hovering over the section you wish to amend and selecting the Edit button. If you wish to remove a section, hover over this and select the Delete button.
By default, all topics will need to be reviewed by the learner before they can move on. If you do not wish for all of these sections to be reviewed, e.g. a use would only review the sections that are relevant to them, you can switch the Must Review All Items slider to off.
13. Previewing a Course
You can preview your course at any point while editing.
To preview your course:
Select Preview in the Course Editor.
This will open your course in its current state in a new window, and will allow you to view it as it would appear to the user.
You can still edit your course in the original window, but to view any further changes made you will need to select Preview again as the preview screen will not update automatically when you make changes to your course.
14. Saving a Course
You can save your course at any time during editing.
To save your course:
- Hover over Save in the Course Editor.
- Select either Draft or Complete.
-
Draft
If you want to make further changes to your course at a later date, save your course as Draft. This means that you can revisit the draft at a later date to make further amendments to if required. -
Complete
If your course is ready to be published, you can save this version as Complete. This means that there are no further changes that you currently want to make, and will save on your Course Builder screen as a new line, but will not be visible to users until you make it Live (see next step in article for making a course live).
You can make further edits to the course whenever you want to, but you must ensure you are editing the latest version of the course.
15. Making a Course 'Live'
Once you have saved your course as a Complete version you can make this live on your system for users to access.
To do this:
- Open your Course Builder Homepage.
- Click on the course that you are now ready to publish live. You’ll see a list of all the versions of your course.
- Select the course you wish to make live by checking the tick box. This will automatically save and the course is now live for all users who have access to complete.
IMPORTANT INFORMATION! If you are unable to make your course live, this is because you have not yet saved the version as Complete. Follow the steps in the previous section of the article for how to save the version as Complete.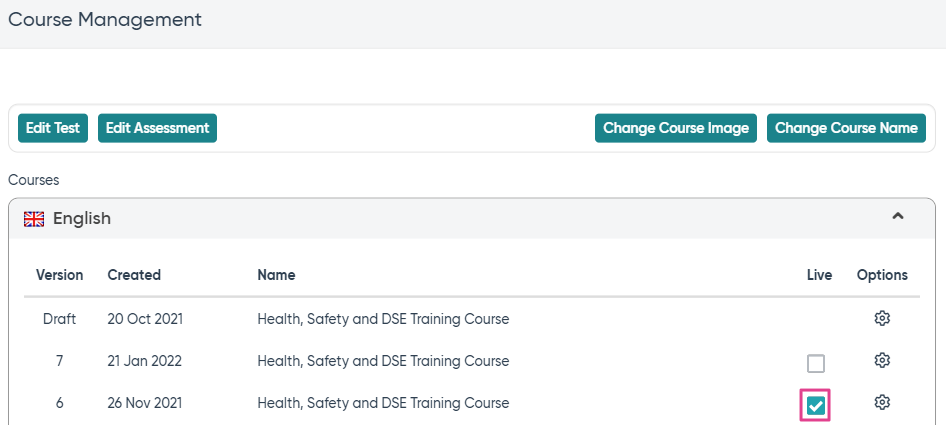
16. Locking a Course
Only one user on your system can edit a version of a course at any time.
If somebody else has the version of a course open, the EDIT button will appear LOCKED. Hovering over the LOCKED icon will show you the email address of who is currently editing the course, so if you wish to edit this version you will need to ask them to save their changes and exit the Course Builder by selecting the Exit button. Only closing the browser will still keep the version locked to the same user and you will still be unable to access.
17. Licensing and Deploying Courses
When you create a new course using the course builder application, you can select it to go live and make it available to users on their dashboards. However, before the course can be deployed, it needs to be licensed by our team if it has never been licensed before.
In the Ideagen Workplace Training system, courses can be licensed in two ways:
17.1 Site-wide License
If a course is licensed site-wide, it will be available to all users on your Ideagen Workplace Training system, and you cannot disable it for any specific user.
17.2 Licensed to a Group
You can license a course to a specific group. In this case, only users who are part of that group will be able to see and access the course on their dashboards. Users who are not in the group will not be able to see the course until you enable it within their individual profiles.
When we license a course to a group, we create a group with the same name as the course. As an administrator, you can then enable the course on the applicable users' training dashboards by either.
Adding the users to the course group, or Enabling the course within each user's profile via the course info tab.
Users who are not part of the course group will not be able to see or access the course until it is enabled for them.