
New article
Recently updated
Navigating the test editor

Who is this article for?Users who have access to the Course builder.
No elevated permission are required.
If you would like to have Course Builder implemented onto your system, please speak to your Account Manager.
This article will guide you through how to use the Course Builder Test Editor. You can either walk through the steps in sequence or jump to the section that is relevant to you:
1. Creating a new test
To create a new test for your course:
- Select your course in the Course Builder, Course Admin screen.
- Select the Create Test button.
- The Create Test pop-up will be displayed.
- You will then enter the following details:
- Test Name - for example Driver Awareness Test.
- No of Questions to ask - for example, 10.
- Pass Rate (%) - for example 80.
- Select the Create Test button.
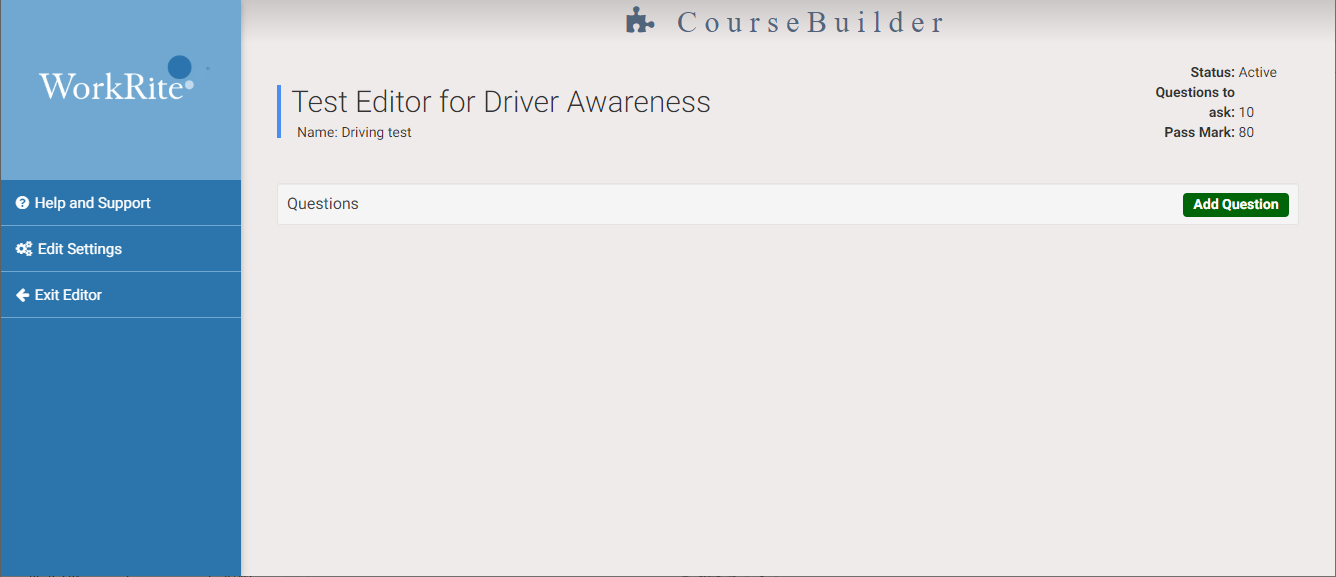
- The Test Editor for Name of course is displayed.
2. Adding questions to a test
- When on the Test Editor for the course You can see the test details in the top right corner of the screen. This includes:
- The current status of the test.
- The number of questions in the test.
- The pass mark percentage.
- Select the Add Question button.
- The Add a Question pop-up is displayed.
- Enter your question in the Question Text box.
- Click the Create button.
- Your question is displayed in the main Test Editor screen. A message is also displayed, informing you that you have not created the specified number of questions.
- Continue adding questions until the warning is no longer displayed.
3. Add answers to questions
- You can add answers to your questions from the Test Editor screen.
- Select the question you want to add answers to.
- Click Add Answer.
- The Add an Answer pop-up is displayed.
- Enter your answer in the Answer Text box.
- If the answer is correct use the slider button Is this a correct answer?.
- Select the CREATE button to save this answer.
- Repeat steps to add the other answers to this question. All incorrect answers should be plausible, so that the learner has to give some thought to their answer.
- Complete the answers to all of your remaining questions.
4. Edit test settings
- To change any of the test settings
- Select the Edit Settings button from the left navigation menu.
- The Edit Test pop-up is displayed. In this pop-up, you can change any of the following settings:
- Name
- Number of questions asked
- Pass rate
- Whether the test is active.
- Place the cursor in any of the fields and edit as required.
- Toggle the Active button to make the test inactive and invisible to the learner. You will still be able to make changes to it and make it active again when required.
- Select the Save Changes button to save the changes to your test settings.
- A message is displayed stating that the changes have been saved.
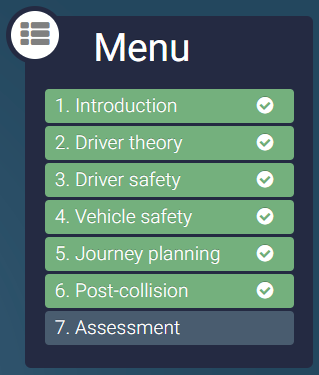
- In this example, the test has been made inactive and removed from the course menu when a learner opens the course.
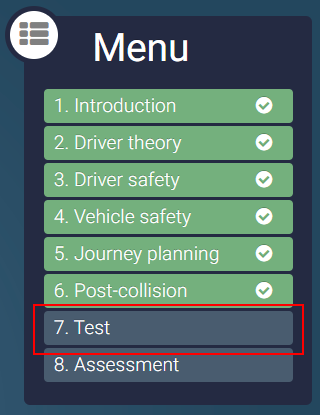
- When the test is made active again, the menu is as follows:
5. Edit an existing test
To open the Test Editor:
- Select your course in the Course Builder, Course Admin screen.
- Select the EDIT TEST button.
- The Edit Test pop-up is now displayed. This displays the test name, the number of questions in the test, pass rate and whether the test is active.
- Select the Edit Questions / Answers button.
- The Test Editor screen is displayed, showing the test details and questions.
6. Edit a test question
This section assumes that you have created a test and added questions and are in the Test Editor screen.
To edit a question text:
- Select the Edit button of the question you want to change.
- The Edit a Question pop-up is displayed.
- Place the cursor in the Question Text box and make your changes.
- When you have finished making your changes, select the SAVE button.
- Your updated question will be displayed in the Test Editor screen.
7. Deleting a question
This section assumes that you have created a test and added questions and are in the Test Editor screen. At this point you want to delete existing questions, including their answers.
To delete a question:
- Select the question you want to delete.
- Select the Edit button.
- Select the Delete button.
- A confirmation message is displayed.
- Select Yes to delete the question and all its answers.
Note: An alternative to deleting the question is to deactivate it. It will remain accessible in the Test Editor, but will no longer be displayed to the user.
8. Deactivating a question
- Select the Active button.
The question is now inactive. The Active toggle is now white and the question text is displayed on a white background.
9. Editing an answer to a question
- Open the question you want to edit.
- The answers to the question are displayed. Alongside the answers are an Active toggle and an Edit button.
- Select the Edit button.
- The Edit an Answer pop-up is displayed.
- Place the cursor in the Answer Text box and make your changes.
- Select the SAVE button.
10. Deleting answers to a question
- Open the question you want to edit.
- Select the Edit button.
- Select the Delete button.
- Select the Yes button.
- A message is displayed informing you that your answer has been successfully deleted and you can now see that the answer has been removed from the question.
11. Deactivating answers to a question
- Select the question which contains the answers you want to deactivate.
- Select the Active toggle.
- The answer will be deactivated and will not be displayed in the test.